
Organizations can issue credentials to our C.TI Wallet that are cryptographically signed and immediately verifiable.
Download the C.TI Wallet mobile app for Android or iOS devices.
|
|
|

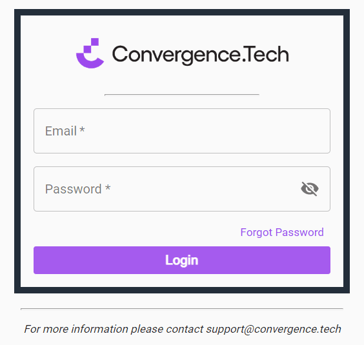
How to Issue Digital Membership Cards (dMSC) / ID Cards / Offline Credentials:
Accessing The Credential
First log in to the C.TI platform.
1. Login to https://cti.convergence.tech/login to access your organisation.
2. In the left-hand navigation bar, click the "Credential Catalog" tab.

3. Find the credential definition you are trying to issue. If needed, use the Search bar at the top of the screen to find the credential definition.
Issuing Digital Membership Cards (dMSC) / IDs / Offline Credentials one-off
1. Click the ‘ISSUE ONE’ button located on the credential definition.
 2. The following screen will display, allowing you to complete the information needed to issue out the credential. Complete the fields as detailed below.

- Add Contact - By clicking on the "+ADD" button in top right corner, you will be able to add a new contact to issue the credential to. Enter the recipient's First Name, Last Name, and Email Address.
- The email address is only used to send the credential to the recipient. The email address is not included in the credential.
- Alternatively, you can also issue to 'Past Recipients' by clicking the carrot icon on the right side of the screen. This will display any past recipients to allow you to select them faster.
- Search Bar - This feature allows you to search for specific contacts that have already been added to the system. After the specific contact is located, you may select them to issue the credential.
CREDENTIAL EXPIRES - If the credential has an expiration, you can choose to add an expiry date or an expiry duration. Select the checkbox next to the section title to display the options. Then, select whether you want the credential to expire on a certain date, or after a certain amount of time, and complete the field.

For more information on setting expiring credentials, refer to Setting An Expiration Date for Credentials.
ADD CONTENT - This will be where you add the value of the recipient’s specific criteria.
- If the "Value" field shows an asterisk, the field is required to continue. Otherwise, you can leave the field blank.
- For the Photo, click the "Choose File" button to upload an optional photo (max size 100 KBs).
3. Once all the required fields are completed, click the ‘ISSUE’ button to issue the ID credential.
By clicking the ‘ISSUE’ button, the credential(s) will be automatically emailed to the contact(s) you selected. There is no further review process beforehand, so be sure to double-check this information before issuance.
If you realize you made a mistake after clicking to issue the credential, please refer to Revoking issued credentials.
Issuing Digital Membership Cards (dMSC) / IDs / Offline Credentials in bulk using an Excel file
1. Click the ‘ISSUE MANY’ button located on the credential definition.

2. When the pop-up displays, download the bulk issuance template for the credential by clicking the "Template" button in the top right.

3. Click to open the xlsx file template. To find the file, you may need to navigate to the Downloads folder on your computer.
4. Once the sheet is opened, the titles will show in the first row and the rest of the sheet will be blank. Enter a row for each recipient. Do not alter the text in the first row (Row 1) as this is needed to map to the credential definition when re-uploaded. To enter the recipient information from Row 2 and beyond, you will have the following columns:
- First Name - This is a required field. This column is for the recipients' first name, including surname, if needed.
- Last Name - This is a required field. This column is for the recipients' last name, including suffix, if needed.
- Contact - This is a required field. This column is for recipients' email address.
- The email address is only used to send the credential to the recipient. The email address is not included in the credential.
- Expiration Date/Duration - This is an optional field, if your credentials will not expire, simply delete this column. Otherwise, if the credential will expire, include the expiration date (e.g. MM/DD/YYYY) or expiration duration (e.g. X days/months/years).
For more information on setting expiring credentials, refer to the bulk issuance section of Setting An Expiration Date for Credentials.
- [Content] - This is a variable field. For the Content section of the credential definition, columns will display with the Name entered in each content row. This column is for the variable value related to each individual recipient. If the content row was set to required in the credential definition, you will need to enter data for every recipient, otherwise you can leave cells blank.
- You may optionally include photos with the credentials. If you choose to include photos, enter the filename of the photo in the cell corresponding to the member name (e.g. "gordon.green_photo").
- Do not include the file type (e.g. ".png" or ".jpeg") when entering filenames in the Excel file or you will be presented with a warning message.
- You may optionally include photos with the credentials. If you choose to include photos, enter the filename of the photo in the cell corresponding to the member name (e.g. "gordon.green_photo").
EXAMPLE
When the file is first opened, the cells are blank:

Complete a row for each recipient, without altering the text in the first row:

5. Review the rows for accuracy and save the file on your computer in a place that's easy to locate. The file is now ready to be uploaded to C.TI.
6. Navigate back to your C.TI instance. Click the "Drag and Drop/Select" box in the pop-up or drag and drop your saved file into the pop-up to import your information.

7. The pop-up will update with the information you had in the file. Review the information on the pop-up for accuracy and resolve any errors that display on the screen. You can also add a Batch Label at the bottom of the pop-up. Labels are used to identify batches of issued credentials. Labels can be used to search for specific batches that were previously issued.

8. If you choose to include photos, they may be uploaded in .jpeg or .png format and must be under 100 KBs each.
Collect all the photos in a single folder and batch award no more than 1,500 - 2,500 membership cards / IDs at a time.
- Drag and drop the photos into the upload area.

9. Once ready, click the ‘Issue’ button to issue the credentials.
By clicking the ‘Issue’ button, the credentials will be automatically emailed to the contacts you selected. There is no further review process beforehand, so be sure to double-check this information before issuance.
If you realize you made a mistake after clicking to issue the credentials, please refer to Revoking issued credentials.
10. After a batch issuance, a check is run through the C.TI platform to see if there were any issues with sending the emails to the email addresses. An error report will be sent to the Admin of your C.TI instance if there are any issues. This report may take a few hours.
11. Once issued, Holders can either print a pdf version of their membership card / ID/ Offline credential or download it to C.TI Wallet.
-
Please share the Recipient Guide with your members / Holders so they know what to do when they receive an email about their credential.